Thanksgiving Countdown Corner Nov. 22:
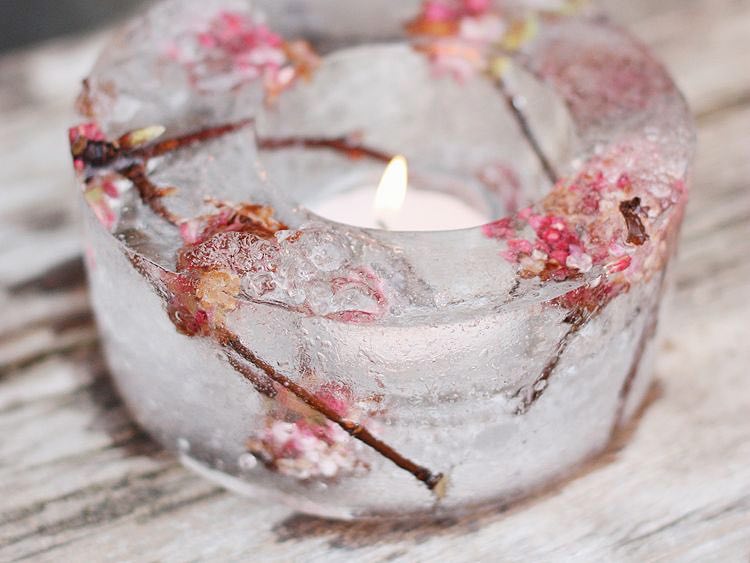
Ice candles are perhaps the most fun of all the things we’ve done leading up to Thanksgiving!
They are amazingly beautiful, totally cost-effective since you are gathering most of the materials from your own yard and they stay as long as the weather is cold, or you have room to keep them in your freezer.
There is no right or wrong way to do this one. The only limitation you have is the amount of room in your freezer, but now that the turkey is out of the way, there should be room for at least a small container.
Use a plastic container (glass will break, and you can’t see to arrange your clippings if you use metal) preferably clear, with sides that are straight, because you are going to have to slide it out, so they can’t curve inward.
Add colorful nandina berries from the garden, (you can substitute cranberries if you have no nandinas) nuts, twigs, small pinecones, sprigs of holly, cedar, juniper, ivy, autumn leaves and boxwood. Fill container about halfway with all or any of the above.
Slowly add water so as not to disturb your contents too much. Some will float; that’s okay. Fill about three-fourths full of cold water. Put container in freezer making sure that it stays level, very important!
Choose another plastic container, much smaller than the first. You are using this to make a “well” for your tea candle. (A good choice is a child’s plastic drinking glass, but if you have something that is plastic but about the size of a shot glass, that will work wonderfully!) Fill the container half full with gravel, marbles or pennies, enough to keep it from floating. Center the glass in the middle of your first container, letting it rest on the greenery; try to keep it as level as possible. It should sink no more than halfway down inside the first container.
Come back several times during the freezing process to make sure that your small container is sitting level inside your large one, else your tea candle will tilt to one side. You might need to prop it up with extra greenery.
When frozen, remove the small container by wiggling it, or filling it with hot water to loosen it enough so that it will easily slide out of the first container. Then loosen the ice from the larger container by running hot water over the outside for a minute. It should slip right out.
Set your large ice sculpture beside your front entrance, place a tea candle inside the space where the small container was and light the candle.
When the weather is cold, these will last a long time. You can also use them as a centerpiece, making sure to set them in something that will catch the water as it melts. (I sometimes set mine on a pedestal cake plate inside a bowl with a rim a little larger than the cake plate, that way, you can see the candles well, but the water runs off the cake plate and into the bowl as it melts.)
It should last through a meal with no problem. Then just add a little water to the original container and place your candle back inside the freezer, taking care not to let the water fill up the candle well.
NOTE ***If you don’t have room for anything this big in your freezer, just use water with the same materials, substituting floating candles instead of a tea candle.
Additional materials for your ice candles:
- Orange and lemon peel (you might have to take a wooden skewer and adjust some of this so that it faces outward)
- Autumn leaves make beautiful ice candles!
- Curly lettuce clippings
- Carrot curls and blueberries
Copyright 2016 Humble Roots, LLC. All Rights Reserved.


